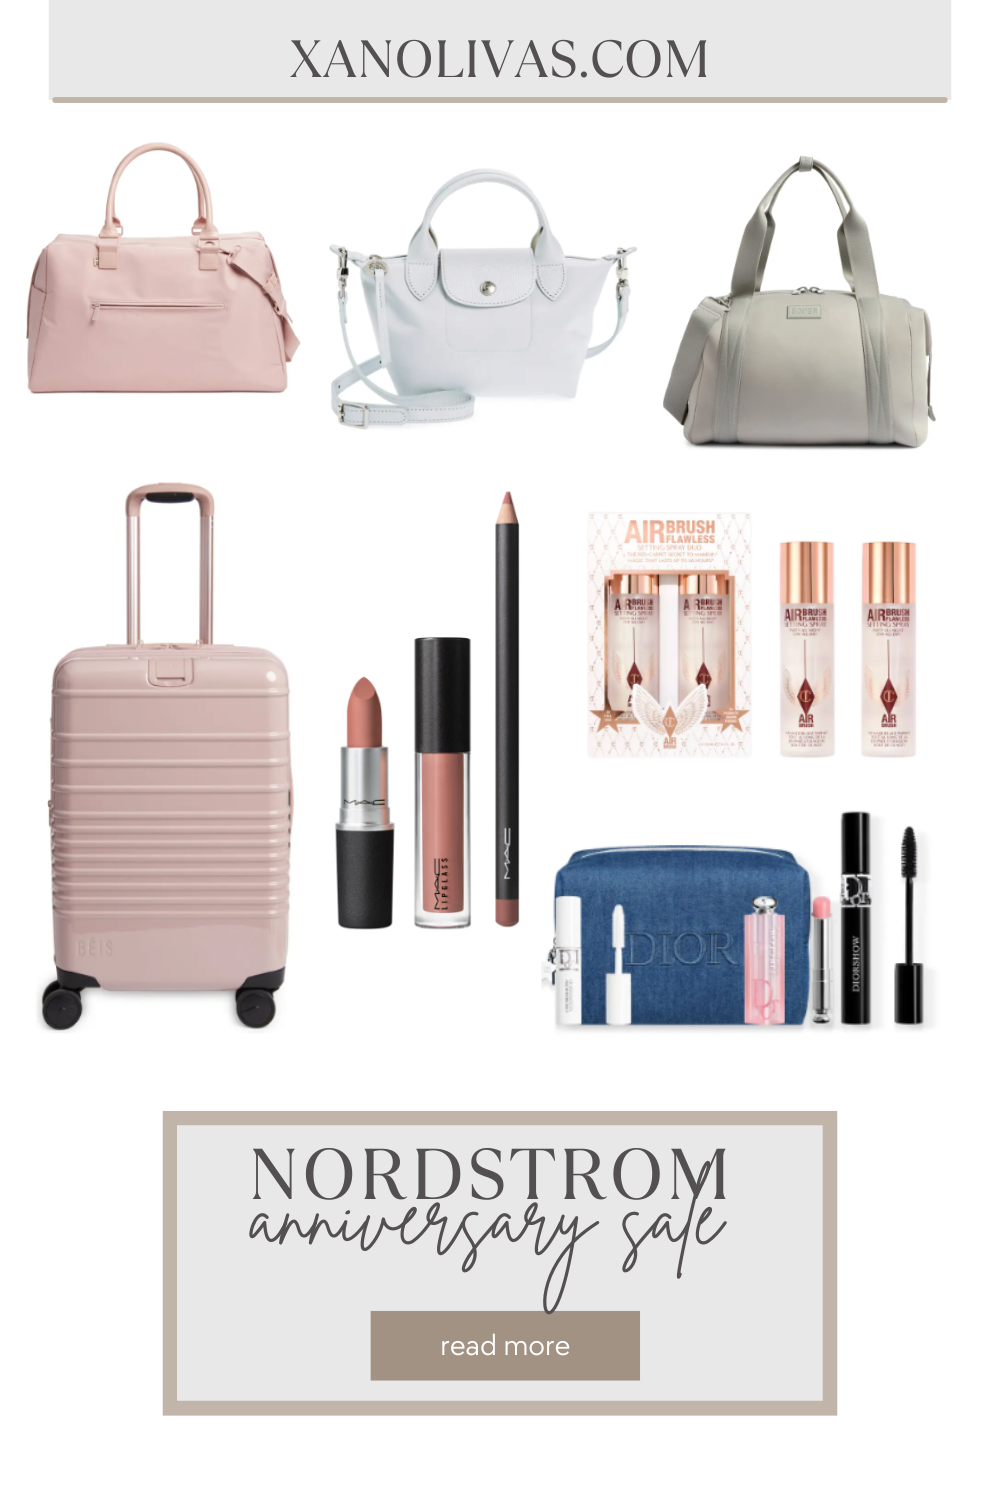
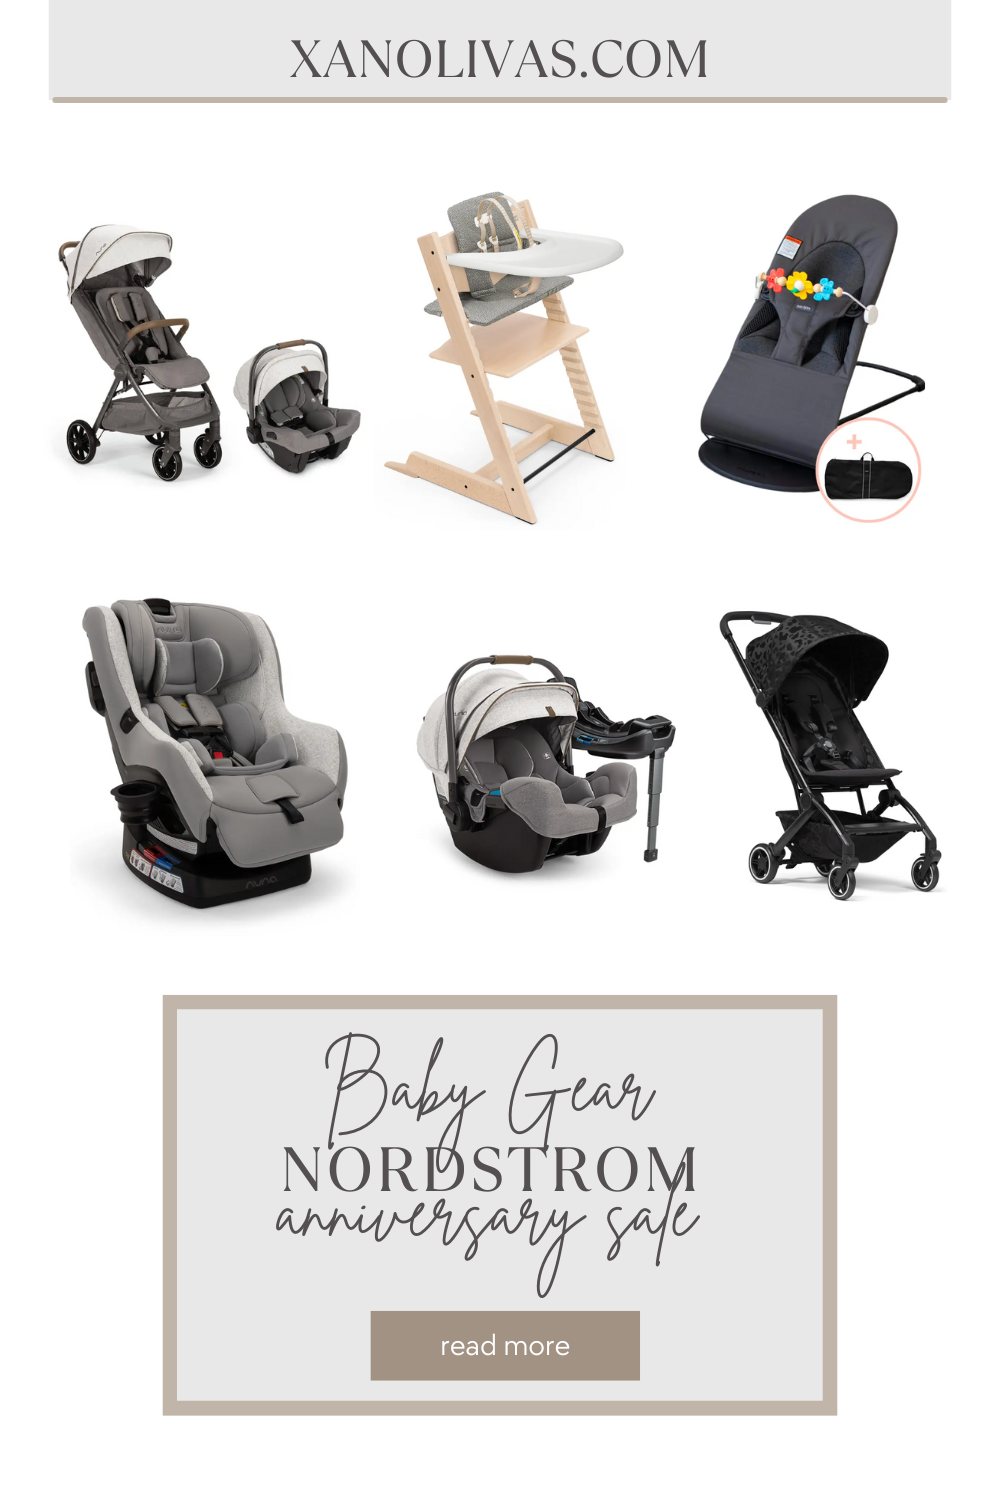
Categories
Fitness Lifestyle

I Did a Liver Cleanse Diet for a Month

I’ve been doing a liver cleanse diet for the month of January, relaxed the diet a little in February but still kept drinking the liver detox drink and eating clean during the week and so far I’ve lost 2.5 inches off my waistline! But get this – I’ve only lost 5 lbs! At the end of January I was only down 3.5 lbs! (This is your reminder to keep going even if the scale isn’t budging!) I posted my morning liver cleanse drink on IG one day and a lot of people asked what liver cleanse I’m doing and I do have to warn you, it’s not for the weak! If you’re looking for a quick 3 day drink cleanse diet, this is not it. This liver cleanse requires that you completely clean up your diet for a few weeks.

The diet is based of Dr. Linda Lancaster’s book Harmonic Healing. I personally have not read the book and really did the diet based off all videos this TikTok user @freddie.1111 created but this is gist of the diet that I did:

  • Drink the liver detox drink in the morning on an empty stomach. Let it digest 2 hours before eating anything else.
  • Meals should be 20% protein and 80% vegetables. I just eyeballed it and made sure there was a lot more vegetables than protein.
  • Cut out all processed foods, sugars, grains, and dairy.
  • All fruits are ok to eat, just no added sugars.
  • Olive oil and avocado oil are ok, but fried foods are not.

Drinking the liver detox drink was the hardest because it does NOT taste good. My husband refused to drink it, but after a week I just chugged it and got used to it. Be sure the completely peel remove the pith from the grapefruit or it will be so bitter! I still make the drink out of habit and I honestly don’t even think it’s that bad anymore.

THIS DIET IS HARD! Even if we were eating pretty healthy 5/7 days of the week! Add on top of that that I do not like leftovers and I had to get pretty creative with the meals. The first week or two is the hardest and honestly, I thought I was dying the first 2-3 days. I didn’t realize how toxic my body was, but the first few days I felt like I was coming down with the flu. My body itched like crazy all over, I had a massive headache, just felt miserable, and all I wanted to do was sleep.

But within a week, I was slowly losing the inches off my waist and I started getting my energy back. 6 weeks later and I’m waking up well before my alarm, the night sweats are gone, and the white coating on my tongue is barely there. I still itch on occasion but it’s nowhere near as bad as it was before. Like I mentioned earlier, I’ve only lost 5 lbs but my weight fluctuated a lot and the scale did not show much progress the first few weeks. I have been lifting heavier in the gym, getting 10k+ steps everyday, and taking my vitamins so I definitely think everything combined contributed to the 2.5 inch loss on my waist.

I want to explain what pushed me to do the cleanse. Before our wedding last year, we tried to lose a few pounds by changing our diet and we did, but not as much as I would hope to. We tried to continue eating clean during the week and working out regularly but I just wasn’t seeing the results that I used to. I knew it had to be my diet. We ate pretty healthy during the week, but would have heavy cheat meals on the weekend and I had a hard time practicing self control when it came to drinking.

I started getting the feeling like there was something wrong with my body. I had trouble falling asleep, I felt so tired in the mornings, I’d constantly need naps during the day. I felt bloated all the time and literally just felt uncomfortable in my own skin. I felt itchy on different parts of my body all the time.

Then I saw a random TikTok by @freddie.111 – in the video, said she noticed she was consistently gaining weight even though she didn’t change anything in her diet so she went to see a holistic doctor who told her that the years she spent on hormonal birth control probably backed up her liver and she should do a liver cleanse. She did it for 6 weeks and ended up losing 13 lbs, her skin cleared up, and overall just felt so much better.

I realized that I’ve been on hormonal birth control pills (specifically Blisovi Fe and Junel Fe) for the past 3.5+ years and I drink regularly. My liver hates me! I started doing more research on liver congestion and I had soo many symptoms:

  • fatigue
  • itchy skin
  • weight gain
  • white coated tongue
  • hormonal acne
  • night sweats

The itchy skin and weight gain bothered me the most. I’d itch all over my body throughout the day but never in the same place. I even went to the doctor a while back to find out what could be causing the issue and she told me that it was probably just allergies and to take an allergy pill everyday! I was already planning to get off birth control in 2023 but ended up deciding to get off this past December and start tracking my ovulation instead. I didn’t see results right away so I knew that I needed to make the full diet change, but there were too many commitments we had in December and too much temptation around me so we made a decision to do Sober January and completely overhaul the diet.

We’ve relaxed the diet once January was over but definitely noticed that when we had carbs or sugar, we felt slower and more sluggish. We’ve decided to continue eating like we’re on the diet during the week and relax it during the weekend. We’re not going to be as restrictive but seeing the results we got and how great we felt during the 4 weeks is enough to keep going, but keep it balanced.

Categories
Da Baum Shelter New Home Build

Da Baum Shelter: Finally Moved In!

After 11 long months, we finally got the keys to Da Baum Shelter on May 10, 2021! I meant to post this with the move, but we are still unpacking and getting settled! We officially signed last Summer in June and expected to close in March, but with all the craziness with COVID, we got pushed back 2 months. I was terrible at posting updates, but I’m planning to post more regularly all the stuff we’ve been doing in the house once we’re settled in! I loved watching our empty lot turn into this gorgeous giant house, hope you guys enjoyed it, too.

July 9, 2020
August 14, 2020
August 21, 2020

August 28, 2020
September 25, 2020
October 16, 2020
November 11, 2020

November 25, 2020
December 15, 2020
January 28, 2021
February 9, 2021
February 20, 2021
February 27, 2021
March 27, 2021
March 27, 2021
April 11, 2021
April 30, 2021
May 4, 2021
May 10, 2021

Categories
Engagement / Wedding

We’re Engaged! How He Asked

We’re engaged! I thought I was going on a girls birthday trip last month, but Adam totally blindsided me and proposed instead! We’ve been together for 2 1/2 years, we started building a house together last summer, and we’re closing in a few weeks so I honestly did not think a proposal was coming until after we were moved into the house.

How He Asked

Last Summer, one of my best friends, Nona, found The Pink Cactus Airbnb in Scottsdale. It was so cute, we thought it’d be the perfect place for my birthday next March! We booked the place for 4 days in March but we didn’t really start planning until we got closer. The place sleeps 12, but there were only 4 or 5 of us that were confirmed. We expected everyone to quarantine and take a COVID test before, if anyone was uncomfortable being around so many people, I wouldn’t be offended if they turned it down. As we got closer to my birthday, it ended up being 7 girls total, I started extending the invite to more people, because I was worried about the cost would be for everyone, but Nona told me we would be okay with just us. I tried to make an itinerary for the whole week, but my sister convinced me not to because she “didn’t want to go out”. The only thing I ended up planning was my birthday dinner at Maple & Ash for my actual birthday on the 8th and Nona planned a ‘girls photoshoot’ the next day around lunch.


After dinner we went back to the Airbnb and had a few drinks, but I went to bed fairly early since I knew we would be doing the photoshoot. Nona mentioned that she had booked a hair appointment at Dry Bar at 11 AM, I thought everyone was going, but she said it was just for me and hair since it was my birthday. She told me I had to be ready for the photoshoot as soon as we got back. I’m a little sluggish the morning after but I get my makeup done, get dressed and we head over to Dry Bar. I remember sitting in the chair getting my hair washed thinking, I’m totally going to take a nap after the photoshoot – boy, was I wrong.

We get back from Dry Bar and Nona is rushing me back into the house, she says everyone is in the back and the photographer’s ready! I walk in the house and she tells me to put down my bag and when I look out the window, I was so confused that I saw my brother in law and a few of my guy friends. I walk out and realize there are flowers on the ground in the shape of a heart, my sister and my closest friends all standing in a circle around a table with an iPad on it. I start freaking out, all I could say was, “WHAT’S HAPPENING?! WHAT’S HAPPENING!” – it is so funny when I think about it. I looked all around for Adam, but I couldn’t see him anywhere! My sister signals for me to come closer and she starts a video on the iPad.

Did you really get engaged if you don’t ugly cry?

The video plays a slideshow of all the things Adam and I have done together while playing our song, GoldFish, No One Has To Know. At the end of the slideshow Adam comes on the video wearing a suit, holding a single rose, and asked me bachelor style, if I “would accept this rose?” I made a face because we both hate the bachelor and for a split second, I thought Adam was going to ask me to marry him over zoom! That’s when he came up from behind me, knelt down, and asked me to marry him.


I had absolutely no clue, which everyone thinks is hilarious because they accidentally dropped hints SO many times! Like my sister says, it’s because I trust them all so much I didn’t think they would lie to me. Everything was perfect and I LOVE so much that my closest friends and my sister were all there to celebrate!

Exactly what I wanted from James Allen
The most amazing, perfect day

Photos were done by Justine Wallstrom Photography. She was absolutely amazing to work with, was super patient and let us do all the poses we wanted to! Highly recommend if you need a photographer in the Phoenix area.


Categories
Fashion Lifestyle Shopping

Steve Madden Snakeskin Boots / Nordstrom Sale

This post may contain affiliate links which means I will get a commission if you make a purchase at no additional cost to you.

If you follow me on Instagram you may have seen my latest caption talking about how Adam says I’ve been looking homeless lately and he’s not wrong! My Summer work from home outfit has been Nike Pro shorts and an oversized shirt or tank top, so when I got a chance to wear these new Steve Madden thigh high boots to date night I took it!

I actually bought these boots off from Nordstrom Rack on sale for $50! They took a month to get them with all the postal delays so I almost forgot about them! I checked the site and they’re sold out now, but you can get still get them on the Steve Madden site for $60 if you enter code SPRING50! They do have other colors too, but sizes are limited. You can shop my entire look below, too:

Today marks the official start of the Nordstrom Anniversary Sale! They opened it up to card members and anyone who has early access a few weeks ago, but I am one of the peasants who have to wait for the official open. Which was probably a good thing otherwise I would’ve spent a LOT more! These are all the things I ended up buying from the sale:

One of my favorite pairs of Quay Sunglasses – The Reina is on sale for $35! I have the white/gold, but these are blush/black so I thought it’d be fun to have different pair. I thought these Karl Lagerfeld Cieone Sandals were really cute and would be a great black sandal staple. They got really good reviews so I’m hoping these are comfortable but if not, I can always return them. I actually bought the Regular Spanx Faux Leather Leggings last year and I love them! I didn’t know they came in a petite fit so I ordered a pair of the petites to try them out. If you can’t tell, I love having staples in my closet that’ll survive me wearing them over and over again!

The last thing that I got was kind of a splurge, but another thing that I would use for a long time, the T3 Cura Ionic Hair Dryer. I know, I know, $150 is steep for a hair dryer, but hear me out. When I was in college, circa 2008, I tried out the Hana Air Hair Dryer which cost $100+. (They don’t sell this hair dryer anymore.) I thought it was kind of ridiculous to use a hair dryer that cost that much but with my thick, long hair, it literally changed my life! My hair is well past my waist now and I can dry my whole head in 10 – 15 minutes! But the thing crapped out on me in the last few months – it won’t turn on when I plug it in anymore! 12 years with that hair dryer is pretty impressive though, so I figured there is something to these high quality dryers and I thought I’d try out this T3. Hopefully this lasts me another 12 years! The T3 Cura is on Amazon for $235 so hopefully it’s even better than my old Hana!

Did you get anything good from the Nordstrom sale?

Categories
Da Baum Shelter New Home Build

Da Baum Shelter: Upgrades We Did/Didn’t Do

The latest update on Da Baum Shelter: We broke ground last weekend! We got calls from our super a few days before letting us know that our permits have been approved and they were ready to break ground last Friday! We’ve been driving by the lot when we’re in the are just to see the neighborhood and our neighbor’s home has been coming up quick so we’re excited to see the progress on ours! Since all the upgrades we picked are totally final now, I decided to do a post on upgrades we did and didn’t do.

The great thing about building a new house is that you get to pick exactly what you want and how you want it. The bad thing about building a house is, everything costs money and things add up really quickly! I talked about all the things we wanted in a house in a previous post, but I wanted to go more into what upgrades we chose, which ones we didn’t, and how much they cost. (Costs are rough estimates).

I’ll start off with all the upgrades we did do so you can understand why we opted out of the others:

  • Waterfall kitchen island ($5400) – The only reason we got this upgrade was because this something I just really wanted for aesthetic reasons. (See the inspo pic above.) We weren’t sure if we could do it at all until we went to the design center and Adam so graciously let me have it! I can’t wait to see how it turns out!
  • Soft close drawers in the kitchen ($1200) – I had soft close drawers in my old apartment and there’s just something so satisfying about pushing them closed. Not to mention, you prevent slamming the drawers and causing wear and tear! I would’ve loved to put these everywhere, but they charge you per drawer so we settled on only the drawers in kitchen since they would see the most wear.
  • Built in refrigerator cabinets ($600) – I could’ve done without this upgrade but Adam thought we should do it and looking at the pictures, I agreed. The picture below left shows the standard cabinets around the fridge and the right is the built in. It’s flushed to the fridge and just looks so much better.

  • Trash can drawer in island & wetbar ($150/ea) – We have one of these in our current house and I love having the trash can hidden instead of out in the open. We opted to add one in the wetbar area too to save space! One thing a friend warned me about is making sure they have the trash drawer goes from floor to counter instead of having a smaller drawer on top of it to match the look of the other cabinets. The smaller trash drawer limits the size of the trash can you put in there.
  • Baja shower ($3200) – This upgrade was purely Adam, I could’ve done with a regular glass door but when we saw the large baja shower in the model, he was completely sold. I actually do love that the shower is so large, it doesn’t need a door – I leave our current shower door open because I’m paranoid mold will start forming when we leave it shut!
  • Gameroom with a wetbar ($7400) – This was something we both wanted and loved from seeing the model pictures. We love having people over and hosting so this room was perfect to put the pool table in! Plus having the wetbar at the back of the room makes it a perfect hangout spot.
  • Bay window in master bedroom ($2600) – This was another upgrade we weren’t planning on doing, but seeing it in the model we loved. It makes the master feel bigger and the windows bring it so much natural light.
  • Atrium doors for the outside patio ($1700) – We originally wanted sliding doors to the backyard patio but they were almost 10x more expensive! We have an entry from the living room and in the dining room and we couldn’t put in sliding doors in one place and not in the other without it looking unbalanced. Atrium doors were a much cheaper middle ground since it still lets more light in the house than a regular door. Plus, when I thought about it, it’s probably better to have the doors because the sliding doors will let in more flies and bugs in the summer!
  • Fan over the outside patio ($600) – It probably would’ve been cheaper to get these done post-build but we both just wanted it out there. Texas is hot almost all year round so we’d make pretty good use out of this fan.
  • Lockers near double garage ($2400) – One thing I wanted was a place to put my purse down when I get home so we opted to get the lockers near the double garage. I could’ve done without this one, too, but if we didn’t put it in it would’ve just been a big white wall. There’s hooks for coats/purses and drawers on the bottom.
  • Dedicated 220V plug in double garage ($800) – This is definitely all for Adam! He has a Tesla that he prefers to charge at one of the super chargers but it would be nice to have a plug at home when he needs it.


If you’re counting, that’s over $26,000 in upgrades! And that doesn’t include all the design options we chose! Here are the upgrades we opted not to do:

  • Mediterranean Elevation (~$43,000) – Adam and I were both set on having a Mediterranean style exterior until we saw the price! We both love the stucco and tile roofs but for $43k we said no thanks.
  • Fireplaces / Hearth Rooms ($3900) – We had the option to add a fireplace in the dining room but we opted not to. It looked nice in the model home but it’s strictly for aesthetics since we’ve never used the fireplace that’s in Adam’s current house.The house even came with a fireplace on the side/middle of the living room but we chose to delete it from the floor plan and replace it with an atrium door. Apparently fireplaces are a Texas thing, but I’m a Hawai’i girl and don’t know anything about that!
  • Media Room ($12,000) – Like I mentioned in the announcement post, Adam hates Media Rooms so the $12k price tag made it easy to say no. I would’ve been okay with it, but doing the media room upgrade would’ve taken the space of the game room/wet bar and the game room would’ve been much smaller. By not doing the media room, we have the option to finish the ‘attic space’ later if we want to.
  • Sliding Glass Doors ($13,000) – Instead of the atrium doors to the backyard patio, we really wanted double sliding glass doors. The huge glass doors let in so much light and looked so good in the model, but one door was $6k and the other was $7k. Compared to the $1700 for both atrium doors it was an easy decision.
  • Extended Patio ($3900) – We liked the idea of the extended patio but in reality it was only 3 feet longer and the hearth room was mandatory. This was also an easy no.
  • Standup Showers ($2,000/ea) – We opted for the baja shower in the master and I think would’ve been nice to have a stand up shower in the guest room downstairs but for $2k, it wasn’t that important to us.
  • Utility Sink in Laundry Room ($2,700) – This was another nice to have but not important to us.
  • Freestanding Tub ($5,000) I LOVE the way freestanding tubs look, they’re so luxe and stylish but for $5k, we couldn’t justify the price. Plus I already got my waterfall counter so I couldn’t fight for this one!
  • Stainless Steel Hood Bent ($2,000) – We both loved the modern look of a stainless steel hood vent, but this upgrade cost $2k. The cost of the cabinets included the cabinets around the vent at no extra cost and upgrading the vent wouldn’t cut any costs around the cabinets so we opted not to do this.
  • Extended Upper Cabinet ($5,000) – Another aesthetic thing I would’ve loved to do but we couldn’t justify the cost and it wasn’t practical. I’m only 5’2″ so I couldn’t reach those cabinets unless I had a ladder and if we wanted to put in glass cabinets for decor, those would’ve been an extra $700. They also recommended doing puck lights for another few hundred so the price just kept driving up for something I wasn’t completely sold on.
  • Pot Filler ($2,000) – I really wanted a pot filler over the stove but Adam thought it was unnecessary. I do all the cooking and I love the way it looks, but after researching it more I decide it wasn’t worth it. If it starts leaking, it’ll cause all kinds of problems over the stove and I don’t really need to fill up pots with water all that much. This was just another nice to have.

I know that was a pretty length post, but when we were deciding on upgrades it was hard for us to decide what we wanted! Hopefully that helps other new builders out there.

Categories
Food & Drink

Make Boba at Home with KassavaCo!

This post may contain affiliate links which means I will get a commission if you make a purchase at no additional cost to you.

Boba tea, or bubble tea, is a drink that originated in Taiwan and it’s usually tea based with tapioca balls (boba) added at the bottom. One of my faves, and a classic, is milk tea boba! With quarantine going on, I haven’t made a trip out to get boba so I was excited when I found out a couple of my sorority sisters started Kassava Co – premium boba tea kits that you can make at home!

How cute is their packaging? It’s a boba straw with little boba pearls falling out! They have two different flavor kits: black tea and green tea. I got to try out the Black Tea Boba Kit with Milk Base. The kit comes with 1 pack each of Boba, Powdered Milk Base, loose leaf Earl Grey Tea, loose leaf Assam Black tea, 6 boba straws, and 6 tea bags. It also came with a personally signed thank you card and a recipe card on how to make the boba tea with variations. I love the minimalist packaging and how you can tell the cardstock paper they used is high quality! You also have the option of getting kits without the milk tea base included. The kits are $30 each with the milk base and $27 each without it.

To make the boba, you boil the tapioca pearls for about 35 minutes, let it cool, then steep the tea. I mixed the tapioca pearls with brown sugar and scooped it into a cup. Then I added the milk base to the tea, added some sugar, mixed well with ice, and poured it over the boba. Boiling the boba is the longest part of the process, steeping the tea and putting it all together is pretty quick. I tried the Assam Black Tea first, then the Earl Grey. I personally prefer the Black Tea, but I love them both!

One thing I really like about making it at home is that I get to control the amount of sugar that goes in it because even the least sweet boba tea has a ton of sugar. The only thing I wasn’t a huge fan of was the string on the tea bags wasn’t super easy to tie – I know, I know, it’s such a minor thing and didn’t affect making the tea. I have a cheap tea infuser like the one below and I preferred using that over the tea bags. I followed the recipe as it was on the card and it recommends 2 tablespoons of milk base, but I liked a little bit less.

Overall, I think it’s a great product and worth the cost. (And I swear I’m not being biased!) It seems like the kit will make 6 drinks (especially based on the number of tea bags and boba straws) and for $30 it’s about on par with buying a boba in store. I definitely like the convenience of not having to go all the way to the store and being able to control the amount of sugar in it. I also love that it’s an Asian-women founded business so I 100% support that! Would you try making homemade boba tea?

Categories
Fashion Lifestyle

Honest Review: Tory Burch Miller Sandals

This post may contain affiliate links which means I will get a commission if you make a purchase at no additional cost to you.


Growing up in Hawai’i, I rarely ever wore shoes – it was always slippahs or sandals. My sister still tells me I look weird with covered shoes on! The Tory Burch Miller Sandals are the ultimate basic sandals – every fashion blogger and her mom has a pair or two! But with good reason, because I love them and I would buy them in every color if I could! The only problem is the price tag – these babies range from $$198 – $225 a pair at full price! I bought my first pair a few years ago in black patent leather and I loved it, but I lost them and didn’t get them replaced until recently.

click through the pic to shop this look

The Miller Sandals go on sale every year, but you have to catch them ’cause they sell out really quick. I found a pair of these dark brown leather Tory Burch Millers on sale at Nordstrom Rack for $138!

I want to say it’s all hype, but I think they are worth the hype! My shopping has evolved from cheap, trendy Forever 21 style to more classic, quality products so I’m willing to pay for better quality if I know it’ll last. Don’t get me wrong, I still love me some Target shoes and I’ll still browse around Forever 21, but I’m willing to splurge on some classic items. Tory Burch Millers are laser cut leather sandals that come in all colors and prints, sometimes the logo is made out of metal instead of leather. They’re constantly coming out with different prints, the latest I’ve seen are these cork sandals:

The sandals are super cute, go with practically everything, and are nice enough to dress up or down. The first pair I bought, I had for a few years before I lost it and they held up really well. They do crease around the area the ball of your feet sits on, but otherwise didn’t show other signs of wear. I found that my old Tory Burch Reva flats wear much more quickly than these. My only gripe with the Miller sandals is there isn’t a lot of support (I mean they are flip flops!) so if you walk around all day, you’ll definitely feel it. If you need more arch support, these are not for you, but I normally only wear them for a few hours at a time. Either way, I’ll totally buy more pairs in different colors! I finally replaced my old pair of black patent leather Millers when I saw them on sale at Saks Fifth Avenue!

Like I mentioned, the sales come and go really quickly but I found these pairs for less than $160! Some reviews say sizing run smalls, but it’s true to size for me. I’m a true 8.5 and sizing up to 9 too big for me.

Overall, I think the Tory Burch Miller sandals are worth the hype and are a classic staple in any closet. Do you have a pair? Which ones do you have?

Categories
Dallas Dallas Eats Food & Drink Texas USA

Dallas Eats: Deep Ellum Pop-Up Sandoitchi

One of the things that I love about Dallas is the ever growing food scene. Having grown up in Hawai’i and having lived in LA, food has always been so important to me. I was worried when I moved to Dallas 5 years ago that there wouldn’t be a great food scene, but it turned out to be a happy surprise! There’s a lot of diversity – Asian, American, Italian, Mexican… I’m still exploring. The pop-up food scene in Dallas has been exploding, especially since COVID hit. Sandoitchi is one of the newest pop-ups and it’s become so exclusive it sells out within 30 minutes of their weekly pre-sale!

HOW DOES IT WORK?

Sandoitchi opens up it’s weekly pre-order on Sundays at 6 PM. The menu varies slightly from week to week (sometimes they have Hot Truffle Chicken Katsu, other times they don’t). They eve have a Wagyu Sando! They give you several options for pick-up times. You choose which sandwiches and sides you want and the date you want to pick it up. There’s only one option for a pick up location – the address they give is the same address as Niwa Japanese BBQ in Deep Ellum. The pick-up door is on the side of Niwa and is marked by a huge Sandoitchi sign.

MY EXPERIENCE

I had heard about Sandoitchi a few weeks ago on Instagram and had been wanting to try it, but it sold out so quick every week! I finally turned on notifications from their IG account and was able to get into pre-orders two Sundays ago. I ordered two Truffle Chicken Katsu Sandos and one Strawberry Matcha Cream Sando for pick up last Saturday. They gave me a pick up window from 12:30 PM – 2 PM, but I didn’t get an email confirmation that my order was ready for pick up until 1:30 PM. I was running late anyway, so I wasn’t able to make it over until close to 2.

I loved the chicken sando because it combines two things I love – chicken katsu and truffle! It wasn’t as amazing as I thought it would be, but I think it’s because it wasn’t hot when I ate it – I had to drive 30 min to pick it up and 30 min back home. Adam was not a fan, but he doesn’t like truffle anything so go figure. The strawberry matcha cream was so good! The matcha wasn’t overwhelming and the cream was the perfect sweetness for me.

THE VERDICT

Overall, I think it’s definitely worth a try. I’d love to try the Wagyu Sando but it’s a little out of budget – the menu last week had it at $55! I heard the pudding they have is really good, but it was sold out by the time I ordered. I’d also want to try the hot truffle sando, which wasn’t on the menu the week I ordered. I’m glad I finally got to try it, but I think I won’t be going back until they have a brick and mortar store so I can get my katsu sando fresh! Have you tried Sandoitchi or anything similar?

Categories
Da Baum Shelter New Home Build

Da Baum Shelter: New Home Design Selections

This post may contain affiliate links which means I will get a commission if you make a purchase at no additional cost to you.

I’m back with another Baum Shelter update! We decided back in June to build a new home with Darling Homes, finalized our design selections a couple weeks ago, and next we’ll have our build meeting with our sales person and the building super. (See this post for an overview of our process). First we had a meeting with the cabinet people, scheduled two meetings at the design center, and had a separate meeting with the tech guy on wiring. By the second design meeting, we had to have all our decisions finalized so it all happened really quickly, but I am really happy with all the decisions we’ve made!


I was concerned about making design selections during COVID, but luckily, the design center was taking in person appointments with a designer – they weren’t allowing walk-ins, but we were scheduled two three-hour appointments and we were required to wear a mask. I loved the designer we were assigned, as soon as she figured out that I was going for a more modern look, she showed me suggestions for everything that I immediately loved. If a price point was too high, she showed us better alternatives. It can be overwhelming with so many options, but I do think having a good designer made everything so much easier. The strategy at the first meeting was to input all our first choices with some backups in mind. We went home, mulled on the choices and make the final decisions by the second meeting. At the second meeting our designer had all our choices from the first meeting laid out and we went through all of them to confirm or make changes.

The hardest decision for us was the floors. We knew we wanted wood floors in all the main areas, carpet in the rooms, and tile in the bathrooms, but wood floors are really expensive so we had to dial back the level of flooring. We ended up narrowing it down to the four options below:

We chose the darkest floors on the left at the first meeting, but when we went home to think about it, we just kept going back and forth on the lighter floors. I looked up so many flooring pictures on Pinterest and my biggest concern was that the swatch wouldn’t translate when it was installed and I would hate the variations. We ultimately decided to go lighter because of maintenance and how bright it makes the room look. We narrowed it down to these three after putting it against our kitchen cabinet choices:

We narrowed it down to these two – Mohawk Industries Modern Lights Miami Oak and Mohawk Industries Cafè Society Froth Oak.

We ended up choosing the darker Miami Oak because we thought the Froth Oak would just be too light with the white cabinets. It was so hard making the decision because of different lighting! This is Adam holding up our final decision:

This is when we came back in the second time and took pictures in different lighting – the swatch was even slightly different than the first one we saw! But I think it’ll look really good.

These were the baluster options we had that didn’t cost extra. Balusters are the columns on the stairs, if you didn’t know. We were originally going to go with the second row first column, but ultimately decided on the first row first column (all straight) since we thought it went more with our modern look.

The kitchen counter was probably the easiest decision because I was absolutely set on having a waterfall counter and I’m in love with the white marbled look. We went with quartz counters in the kitchen. This is the Omega Stone in Prato:

For the cabinets, we decided to go with shaker cabinets. We opted to install cabinet pulls ourselves so we’re still in the market for those. We decided to have the island cabinets be a light gray with the wall cabinets all white. This pin was definitely inspiration:

The final kitchen choices below are the wood floors we chose, a smaller swatch of the Prato counters, long white subway tile, and the white and gray swatches of the cabinets. The shaker cabinets will have a more straight edge like this. You can’t really tell from the picture but the subway tiles have a shiny texture to them, they’re called Costa Clara Cloud Wall Tile . The backsplash will be in a horizontal staggered pattern.

We also decided to go with a black faucet and sink! The pictures below aren’t the exact models but pretty similar, we went with the Moen Eva Faucet in Matte Black and the Mirado Quartz Single Blow in Black. I did do some research on maintenance before making the final decision and I don’t think it’ll be as high maintenance as a lot of people would expect.

For the wetbar/gameroom we decided to go darker and more fun. We chose a dark chocolate color for the cabinets, with grey counters (Omega Stone in Caliza), and a navy blue subway tile for the backsplash (Color Wheel in Navy). I originally wanted black cabinets but when we saw the swatch for the black next to this one, it just looked kind of flat. We opted to do the backsplash in a herringbone pattern, inspired by the pin below:

Here’s the slab of the Omega Stone in Caliza – as you can tell I’m obsessed with veining in counters. These are also quartz counters and we ended up choosing the same counters for our master bath as well.

For the extra bathrooms, we opted to get engineered marble for the counters, it’s similar to marble but a lot cheaper. Cabinets are also white in all bathrooms, except for the powder half bath. There’s also a little “tech center” by one of the garage entrances that will use this same counter. These counters are the Marlana Engineered Marble in Harmony:

The tech center will have the short white subway tile below in the horizontal stagger. (Daltile Vitruvian 3×6 tile in Gloss White. For the extra bathrooms, we chose the gray tile on the right, Daltile Cabris 12×12 Tile in Iron, for the floors and the shower walls.

The floor tiles will be in a straight lay pattern. Here’s a flat lay of the same tiles:

We originally wanted the stairs to be wood, but pricing for that is outrageous, so we chose to have carpeted stairs. We chose this gray carpet, Mohawk Industries Calming Dreams in Mountain Pass. This same carpet will go into all of the rooms. The wooden block to the right of the floors is the railing on the stairs.

For the powder half bathroom, we wanted it to be different from the other bathrooms. We splurged on the tiles with Ironcraft Unpolished 12×24 tiles in Charcoal Gray and ended up going with a White Carrara Marble Counter. We made the cabinets the same dark chocolate color as the wetbar.

Last but not least, the Master Bathroom! Adam really wanted to upgrade to the baja shower (it’s a bigger walk in shower that has tile up to the ceiling). We chose the white marbled tile on the top left, Florentine Glossy 10×14 Wall Tile in Carrara. It’ll be set in a horizontal straight lay and the same tiles will be around the master tub skirt. The counters are the same Omega Stone in Caliza as the wetbar, and the cabinets will be the same white as the kitchen. The floor tiles are Ballatore 12×24 in Beat. The shower floor tiles will be the same but cut into 4×4 instead.

As you can see from all our choices, we pretty much have a neutral gray color palette for the entire house. We drove by our lot last weekend and there hasn’t been any work started yet. We have our builder’s meeting this week and I think from there we’ll know when they’ll officially break ground and get an ETA on the completion! Can’t wait until we can start doing weekly updates!

Categories
Da Baum Shelter New Home Build

Our New Home Build Process

When we decided to build a new home it was a little overwhelming since we neither of this had done this before. I tried to search for other people’s experiences/reviews on all the builders we considered and found a few older blogs, but every builder is different and it seemed like the best way to learn was to walk through the fire. I want to be as transparent as I can be on this whole process (without giving up our privacy) in the hopes that it’ll help someone else.

The first step was finding a community and a builder. First we picked the community – location was very important to us. We went through all the available builders and all the floor plans and picked the builder based on costs and floor plan. We ultimately decided on Darling Homes as our builder.

These were our lists of things we wanted in a house.

  • Master bedroom on the first floor (this is a Texas thing apparently)
  • Wood floors in main living areas
  • Huge kitchen, since I do a lot of cooking
  • Waterfall kitchen island, something I really wanted
  • Two story ceilings in the living room, something Adam really wanted
  • Three car garage
  • Gameroom / wetbar area

We didn’t want a formal dining room or a media room. I would have been okay having a media room, but Adam also absolutely refused to have one and he also refused to have what we called a “wood room” – this is where the study/office is completely made out of wood and seemed to be common in a lot of older houses. (See below).

I got him to compromise and allow the study room to be my office but the media room was out. Either way, we had a pretty hefty list so you can imagine why we decided to build! We also wanted something turnkey and did not want to have to renovate anything.

With COVID-19 affecting everything, we had to make an appointment to check out the Darling home model. But once we saw it, we were completely sold! It looked so much better in person than it did online! We followed up with the community’s sales person and we were given a ton of information and documents to look through. It was a little overwhelming and I’m not sure if every builder gives out that much information up front (it may have been the initial salesperson we were working with), but they broke it down into 6 major steps before we officially break ground and start building a house. I for one appreciated getting as much information as possible! I made this handy infographic below that kind of outlines our process:

As a disclaimer, this was the process we had to go through with our builder and the details of what is done when may be different, but from what I understand, overall is generally the same. After choosing the builder and exact floor plan, we had these next 6 steps before we can say the building is in progress.

  1. PRE-QUALIFICATION – First we had to fill out an application to pre-qualify us with their preferred lender. Most builders will require you to be pre-qualified with their lender, but you don’t have to mortgage with them. However, if you do end up choosing their lender, there are usually some incentives they offer that will go to your design costs or even closing.
  2. SELECT EXTERIOR OPTIONS – Next we had to decide on exterior options – this includes the exterior color palette, structural options / upgrades, garage door style, and front door style/stain. Structural options are things that need to be included in the floor plan, like adding or deleting fireplaces, media rooms, etc. Basically, you need to choose what your house looks like from the outside and make sure the floor plan includes everything you want.
  3. EARNEST MONEY – For our builder, the earnest money was a 5% deposit that was calculated off the base price of the house plus structural options. This did not include interior design options. They also said this earnest money would be used to start the house build. At this point, we got a draft of our contract.
  4. SIGN CONTRACT – After reviewing the contract by ourselves, with our realtor, with the salesperson, and making sure all the structural options we wanted were included and all our questions were answered, we signed the contract. At the time of the contract signing, the 5% deposit is non-refundable and the structural options that were chosen cannot be changed. The deposit is now NON-REFUNDABLE. You’re locked into the contract now!
  5. DESIGN CENTER MEETINGS – This is the fun part, you get to choose all your interior options! There are several different people that we had to meet with to get the interior designs/upgrades. We met with the Cabinet people prior to our first Design Center meeting and at the actual Design Center we saw tons of samples and picked out finishes. We picked out things like countertops, sinks, flooring, and interior wall paint. We also met with a separate person to meet with for lighting / electrical. All of these need to be picked out before they start building the house! Don’t worry, I plan on doing separate posts on these, too!
  6. PRE-CONSTRUCTION MEETING – After all the design stuff has been signed off, we’ll have one final meeting with the superintendent and sales to confirm everything before they start the build. We’re still getting final sign-offs on everything, but I’ll update this page when we make it there.

We’re currently in between 5 and 6 of the process but it’s definitely a lot of things up front. The design part is definitely the most fun part (aside from watching it actually come together) but it’s definitely stressful because things started adding up really quickly! Hopefully that helps anyone looking into the new build process, if you have any questions, leave a comment below or email me directly and I’ll be glad to answer! Be sure to follow along on Instagram #DaBaumShelter or check back on the blog for regular updates!